Cobra Knot Instructions: A Comprehensive Guide
Discover detailed, step-by-step instructions for mastering the Cobra Knot, also known as the Solomon Bar or Portuguese Sinnet, with this comprehensive guide.
Learn to create secure and visually appealing projects, from bracelets to lanyards, utilizing animations and clear explanations for easy understanding.
Explore techniques for finishing and securing your knots, ensuring durability and a professional look, including tucking ends and sealing paracord.
Embarking on the journey of learning the Cobra Knot opens a world of possibilities in crafting and practical applications. This foundational knot, celebrated under various names – Solomon Bar and Portuguese Sinnet – is remarkably versatile and visually striking. Its inherent strength and customizable nature make it ideal for a diverse range of projects, extending far beyond simple decorative items.
Historically, this knot has served functional purposes, evolving into a popular choice for modern survivalists, outdoor enthusiasts, and crafting hobbyists alike. Understanding the basic principles of the Cobra Knot is the first step towards unlocking its potential. This guide will demystify the process, providing clear, concise instructions suitable for beginners while also offering insights for those seeking to refine their technique.
We will delve into the core mechanics of tying the knot, emphasizing the alternating weave that defines its characteristic appearance. Prepare to transform simple cordage into durable and aesthetically pleasing creations!
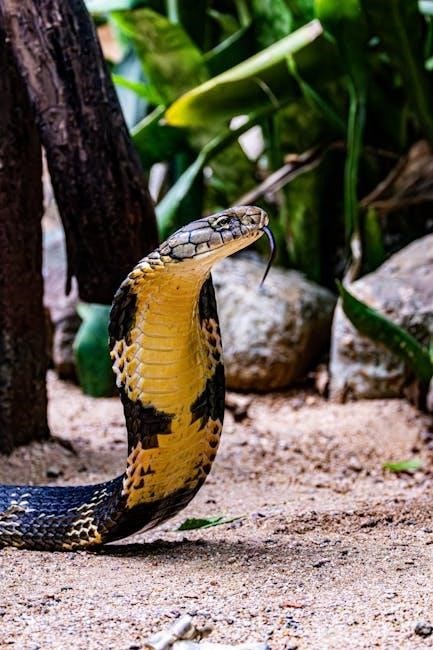
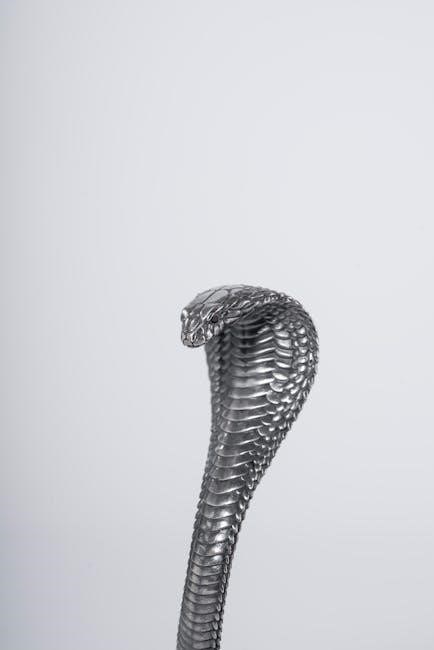
What is the Cobra Knot? (Solomon Bar, Portuguese Sinnet)
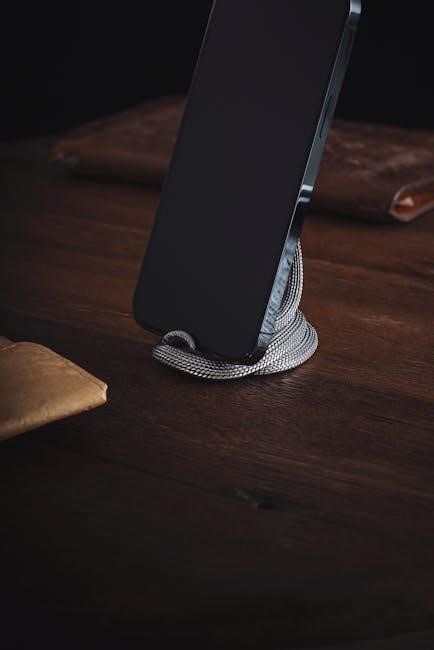
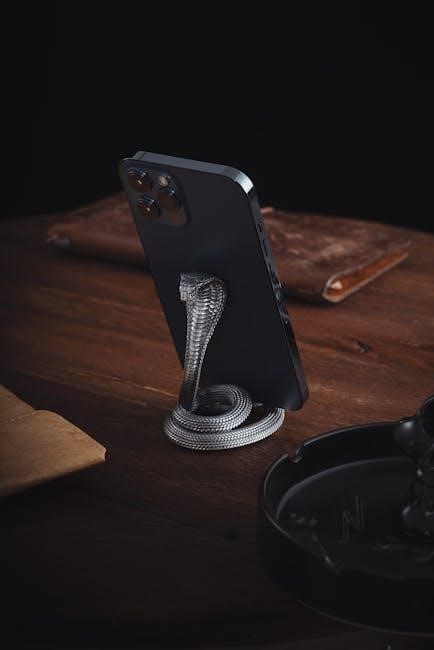
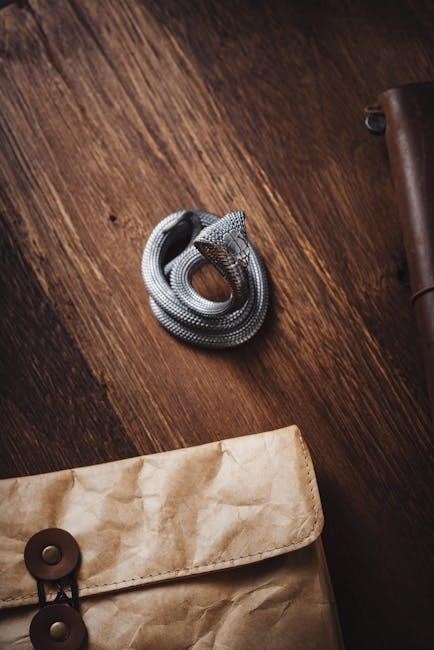
The Cobra Knot, also widely recognized as the Solomon Bar or Portuguese Sinnet (ABOK 2496, p 401), is a decorative and functional knot renowned for its robust construction and appealing aesthetic. It’s fundamentally a variant of the square knot, but constructed with a weaving pattern that creates a flat, braided appearance. This distinctive weave isn’t merely for show; it significantly enhances the knot’s strength and stability.
Essentially, the Cobra Knot is formed by repeatedly tying two half-knots in alternating directions, then weaving the working cord around the standing parts. This process builds a dense, interwoven structure. Its versatility stems from its adaptability – it can be adjusted in width and length, and even customized with multiple colors for striking visual effects.
The knot’s inherent security makes it ideal for applications requiring a reliable and durable connection, while its visual appeal lends itself beautifully to decorative projects. It’s a foundational knot for anyone interested in cordage work.
Historical Uses of the Cobra Knot
Historically, the Cobra Knot’s origins are somewhat obscured, though its variations – the Solomon Bar and Portuguese Sinnet – boast long-standing traditions in maritime and crafting cultures. Sailors frequently employed similar weaves for creating robust and decorative lanyards, bell fringes, and securing items on deck. The knot’s strength and resistance to slippage made it invaluable in a nautical environment.
Beyond seafaring, evidence suggests the knot was utilized in various indigenous cultures for crafting functional items like belts, straps, and even components of horse tack. Its adaptability allowed for diverse applications, reflecting a practical understanding of cordage mechanics.
The name “Solomon Bar” potentially alludes to biblical associations with King Solomon’s wisdom and craftsmanship, while “Portuguese Sinnet” points to its prevalence in Portuguese maritime traditions. Regardless of its precise origins, the Cobra Knot’s enduring popularity speaks to its inherent utility and aesthetic appeal throughout history.
Materials Needed for Cobra Knot Projects
Essential supplies include paracord (various types and sizes), buckles for adjustable projects, a lighter for sealing ends, and measuring tools for accurate cord length calculations.
Paracord Selection: Types and Sizes
Choosing the right paracord is crucial for successful Cobra Knot projects. Type III 550 paracord is the most common, offering a good balance of strength and flexibility, typically with a 7-strand core. However, other types exist.
Consider Type I (100lb test) for lighter applications or Type IV (750lb test) for heavier-duty needs. Paracord comes in various diameters; 5/32 inch is standard for most knots.
Nylon is the most prevalent material, known for its durability and resistance to abrasion. Polyester paracord offers greater UV resistance, making it ideal for outdoor projects.
Beyond standard options, you’ll find paracord with different core strand counts and even specialized versions like pre-treated paracord for enhanced grip. The length needed depends on the project, but always overestimate to account for weaving and finishing.
For bracelets, a typical length is around 10-15 feet, while lanyards may require 20-30 feet or more. Selecting quality paracord ensures a strong and long-lasting finished product.
Cordage Alternatives to Paracord
While paracord is popular, several alternatives can be used for Cobra Knot projects, offering different aesthetics and properties. Sterling cord, a strong and durable option, provides a natural fiber look. It’s excellent for applications where a softer feel is desired.
Another choice is nylon utility cord, which is similar to paracord but often more affordable. However, it may lack the same level of abrasion resistance. Polyester rope offers superior UV resistance, making it suitable for outdoor use.
For decorative projects, consider using waxed cotton cord, which provides a unique texture and finish. Leather cord can also be woven, creating a distinctive and rugged appearance.
The key is to select a cordage with sufficient strength and flexibility for your intended application. Experimenting with different materials can lead to creative and personalized Cobra Knot designs. Remember to adjust techniques based on the cord’s thickness and texture.
Tools Required: Buckles, Lighters, Measuring Tools
Successfully executing Cobra Knot projects requires a few essential tools. A sturdy buckle is often needed, particularly for bracelets and collars, to provide a secure closure and adjustable fit. Side-release buckles are commonly used for their ease of use.
A reliable lighter or heat source is crucial for sealing the ends of paracord, preventing unraveling and creating a clean finish. Exercise caution when using heat, and work in a well-ventilated area.
Accurate measuring tools, such as a ruler or measuring tape, are vital for determining the correct cord length needed for your project. Precise measurements ensure a proper fit and minimize waste.
Additionally, scissors or a sharp knife are helpful for trimming excess cord. A fid or marlinspike can assist in weaving the cord through tight spaces. Having these tools readily available streamlines the knot-tying process and enhances the final product’s quality.
Basic Cobra Knot Tying Techniques
Master the foundational steps of the Cobra Knot, beginning with the initial setup and progressing through the creation of alternating left and right half-knots.
Starting the Knot: Initial Setup
Begin your Cobra Knot journey by taking two strands of paracord, ensuring they are of equal length – the length will depend on your desired project size. Fold the cords in half, creating a loop at the midpoint. This loop will serve as the foundation for your knotting process.
Next, create a simple overhand knot with the folded cords, leaving a small loop at the top. This initial knot acts as the anchor point for the weaving process. The size of this loop will influence the overall aesthetic of your finished piece, so adjust accordingly.
Secure the anchor knot firmly, but not excessively tight, as it needs to allow for the weaving of the cords. Position this anchor knot so that it’s easily accessible for the subsequent steps. Many tutorials suggest attaching this initial loop to a buckle or a fixed point for easier handling during the weaving stages.
Finally, lay the two working ends (the strands extending from the anchor knot) side-by-side, preparing them for the first set of half-knots. This careful setup is crucial for achieving a neat and consistent Cobra Knot weave.
The First Half-Knots: Left and Right
Initiate the weaving process by creating a half-knot with the left cord over and around the two center cords. Ensure this knot is snug but not overly tightened, allowing for adjustments later. This establishes the foundational pattern for the Cobra Knot.
Subsequently, create a matching half-knot with the right cord, also going over and around the center cords. This should mirror the first half-knot, creating a symmetrical base. Consistency in tension is key for a uniform appearance.
Repeat this sequence – left half-knot followed by a right half-knot – to build the initial row of knots. These first two half-knots are critical as they dictate the direction and structure of the entire weave.
Visualize each knot as a building block, carefully layering them to form a solid foundation. Maintaining even spacing and consistent tension will result in a cleaner, more professional-looking Cobra Knot. Practice these initial knots to gain confidence and dexterity.
Weaving the Cord: Alternating Sides
Continue the Cobra Knot by consistently alternating sides with each successive half-knot. After completing the initial left and right half-knots, take the left cord and weave it over and around the existing structure, creating another half-knot.
Then, switch to the right cord and repeat the process, weaving it over and around the structure in the opposite direction. This alternating pattern is the core of the Cobra weave, building upon the foundation established by the first two knots.
Maintain consistent tension throughout the weaving process to ensure a uniform and aesthetically pleasing result. Each half-knot should be snug, but not so tight that it distorts the overall shape.
As you progress, observe how the cords interlock, creating a robust and visually appealing braid. This rhythmic alternation of left and right weaving forms the characteristic diamond pattern of the Cobra Knot.
Advanced Cobra Knot Variations
Explore beyond the basics! Discover techniques for creating visually striking variations like two-color weaves, wider braids, and secure integrations with buckles for diverse projects.
Two-Color Cobra Knot
Elevate your Cobra Knot projects with a vibrant two-color design! This variation introduces a dynamic aesthetic, adding depth and visual interest to your creations. The technique involves alternating between two distinct paracord colors during the weaving process. Begin by having two cords of different colors ready – one serving as the base and the other as the weaving strand.
Follow the standard Cobra Knot pattern, but consciously switch the weaving color with each pass. For instance, if you start with Color A, weave with it for one half-knot, then switch to Color B for the next. This consistent alternation creates a striking striped effect. Ensure consistent tension throughout to maintain a clean and even pattern.
Experiment with contrasting colors for a bold look or complementary shades for a more subtle effect. This technique is particularly effective for bracelets, lanyards, and decorative elements, adding a personalized touch to your handmade items. Mastering this variation unlocks a new level of creativity within the Cobra Knot family.
Wide Cobra Knot (Double Cobra Weave)
Achieve a bolder, more substantial look with the Wide Cobra Knot, also known as the Double Cobra Weave. This technique effectively doubles the width of a standard Cobra Knot, creating a robust and visually impressive braid. It’s ideal for projects requiring increased strength or a more prominent aesthetic, like dog collars or heavier-duty lanyards.
The core principle involves weaving the paracord twice through each section before moving to the next. Instead of a single pass, you’ll loop the weaving cord around both the base cords twice, effectively layering the weave. This doubling process significantly increases the knot’s density and width.
Maintain consistent tension throughout the weaving process to ensure a uniform and aesthetically pleasing result. This technique requires slightly more paracord than a standard Cobra Knot, so plan accordingly. The Double Cobra Weave offers a striking variation, adding both durability and visual impact to your projects.
Cobra Knot with a Buckle
Integrating a buckle into your Cobra Knot projects adds functionality and a refined finish, particularly for bracelets and collars. The process begins by threading the paracord through the buckle’s loops before initiating the knotting sequence. Ensure sufficient cord length extends beyond the buckle to comfortably complete the weave.
Begin with the initial setup, securing the cord to the buckle using a lark’s head knot or a similar secure attachment method. Then, proceed with the standard Cobra Knot weaving technique, carefully alternating sides and maintaining consistent tension. The buckle serves as a fixed anchor point, influencing the overall structure.
When nearing completion, carefully weave the cord around the buckle’s structure, ensuring a snug and secure fit. Proper integration of the buckle enhances both the aesthetic appeal and practical usability of your Cobra Knot creations, offering a polished and secure closure.
Cobra Knot Applications & Projects
Unleash your creativity! Explore diverse projects like bracelets, lanyards, and dog collars using the Cobra Knot. Learn precise measurements and cordage calculations for optimal results.
Cobra Knot Bracelets: Measuring and Fitting
Creating a comfortable and well-fitting Cobra Knot bracelet begins with accurate wrist measurement. Use a flexible measuring tape to determine your wrist circumference, ensuring a snug but not overly tight fit. Remember to add approximately 1-2 inches to this measurement to accommodate the knot’s bulk and allow for comfortable movement.
For a standard Cobra weave bracelet, you’ll need approximately 8-12 feet of paracord, depending on wrist size and desired bracelet length. Begin by creating a loop with the cord, securing it with an overhand knot. This loop will form the base of your bracelet.
Lay the right cord across the middle, then push it through the loop on the right. Continue alternating sides, mirroring each knot to build the weave. Keep the initial knots slightly loose to facilitate tucking in the ends later. Once the bracelet reaches the desired length, carefully tuck the remaining cord ends into the woven structure to prevent unraveling, then tighten and trim.
Cobra Knot Lanyards: Length and Cordage Calculation
Determining the appropriate length and cordage for a Cobra Knot lanyard requires careful calculation. Consider the intended use and desired drop length when establishing the overall lanyard length. A typical lanyard ranges from 18 to 36 inches, but adjust based on personal preference and accessibility needs.
For a 2.5-foot (30-inch) lanyard, approximately 225 inches of paracord – utilizing two pieces – is recommended; The Cobra weave significantly shortens the overall length due to its dense structure. Therefore, factor in at least a 30-40% reduction in length when calculating the initial cordage needed.
Begin by creating a loop for attaching a clip or keyring. Securely weave the Cobra knot, maintaining consistent tension throughout. Remember to leave the final knots slightly loose for tucking in the ends, ensuring a clean and durable finish. Properly sealed ends prevent fraying and enhance the lanyard’s longevity.
Cobra Knot Dog Collars & Leashes: Safety Considerations
When crafting Cobra Knot dog collars and leashes, prioritize your pet’s safety above all else. The knot’s inherent strength is beneficial, but proper construction and material selection are crucial. Avoid excessively tight knots that could cause discomfort or restrict breathing, particularly around the neck.
Regularly inspect the collar or leash for signs of wear and tear, including frayed cordage or loosened knots. The Cobra weave, while durable, can weaken over time with repeated stress and exposure to the elements. Replace damaged items immediately to prevent potential hazards.
Consider your dog’s size and temperament when determining the appropriate width and thickness of the paracord. Larger, stronger dogs require more robust materials. Always supervise your dog while using a handmade collar or leash, and never leave them unattended.
Finishing and Securing the Cobra Knot
Ensure knot longevity by tucking in loose ends, tightening all sections, and carefully burning/sealing paracord tips to prevent unraveling and maintain structural integrity.
Tucking in the Ends: Preventing Unraveling
Securing the ends of your Cobra Knot is crucial for preventing unraveling and ensuring a durable finish. After completing the weave, leave the final several knots slightly loose – this provides space for tucking. Carefully thread each paracord end inside the woven structure, following the path of the existing cords.
Utilize a fid or similar tool to assist in guiding the ends through the tight weave, especially with thicker paracord. Gently work the ends back and forth to create a neat and secure tuck. The goal is to conceal the ends completely within the knot’s body, eliminating any visible loose strands.
Once tucked, slowly tighten the previously loosened half-knots, drawing the ends further into the weave. This process effectively locks the ends in place, preventing them from slipping out over time. Inspect the tucked areas to confirm they are flush with the knot’s surface and show no signs of potential unraveling. A well-tucked end is nearly invisible and contributes significantly to the overall strength and longevity of your Cobra Knot project.
Tightening and Adjusting the Knot
After tucking in the ends, achieving a clean and uniform appearance requires careful tightening and adjustment of the Cobra Knot. Begin by gently pulling on the standing ends of the paracord, working your way along the entire length of the weave. This distributes tension evenly, eliminating any slack or looseness.
Pay close attention to the individual half-knots, ensuring they are snug and consistent in size. If any areas appear uneven, subtly adjust the tension by pulling on the adjacent cords. Avoid over-tightening, as this can distort the knot’s shape and potentially weaken the structure.
For projects like bracelets or dog collars, periodically check the fit and adjust the knot accordingly. A properly tightened Cobra Knot should be firm and secure, yet still allow for comfortable movement or wear. Consistent tension throughout the weave is key to a polished and durable final product, maximizing both aesthetics and functionality.
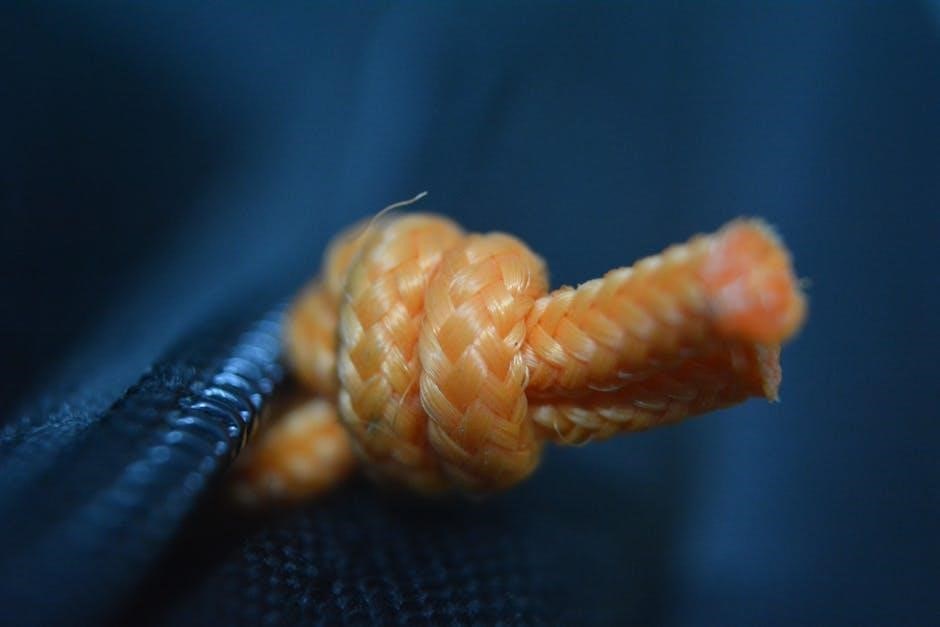
Burning and Sealing Paracord Ends
To prevent unraveling and ensure a professional finish, burning and sealing the cut ends of the paracord is a crucial final step. Use a lighter to carefully melt the ends, creating a small, fused bead. Exercise extreme caution during this process, as melted paracord can cause burns.
Hold the flame briefly near, but not directly on, the end of the cord. Allow the melted plastic to form a rounded knob. Avoid excessive heat, which can damage the surrounding weave or create a brittle seal. A properly sealed end should be smooth and secure, preventing fraying.
Alternatively, consider using a specialized paracord sealing tool for a cleaner and more controlled finish. Always work in a well-ventilated area and have water nearby as a safety precaution. This technique provides lasting durability and enhances the overall appearance of your Cobra Knot projects.